For the last few years, I put off learning Vellum because I didn’t have a Mac and I used some free book formatting software. Since Vellum for Windows doesn’t exist, there is a fairly easy solution. Sign up for a MacinCloud account and use a virtual Mac to run Vellum.
Now that I’ve created a MacinCloud account using the “pay as you go” option, I rent a virtual Mac that has Vellum installed on it (and can now use Vellum as my ebook program of choice). The documentation below is a step by step guide that will walk you through how to connect to MacinCloud, load Vellum, and then import a book file, and go through the major settings in Vellum so that you can create the various ebook and print files you need for the major publishing platforms.
Step 1:
If you’re on a PC, you will need to use the MacinCloud service. Log in and connect to your virtual Mac. If you’re already on a Mac, you can skip this step.

On the next screen, enter in your login credentials for your virtual Mac on the MacinCloud service.

Step 2:
Once you’re logged into your virtual Mac, click on the Vellum software icon in the system tray to load the program.

Tip: If you’re using MacinCloud with Vellum, you can use the full features of Vellum—except you can’t Generate the ebook and Print files. You’ll need to purchase Vellum and then activate the software on your virtual Mac. (Once you purchase a license, log into your email when connected to your virtual Mac and you’ll see that you received a confirmation email with a link to Vellum’s “Restore” feature to request your license. Simply click on the “Restore” link in the email and you’ll receive a second email with a “Restore License” link in it. Click on the “Restore License” link and the Vellum software will activate and you’ll then be able to generate your books. Remember, make certain that you’re logged into the virtual Mac when you do all this. If you’re already on a Mac, you can ignore this bit.)
Step 3:
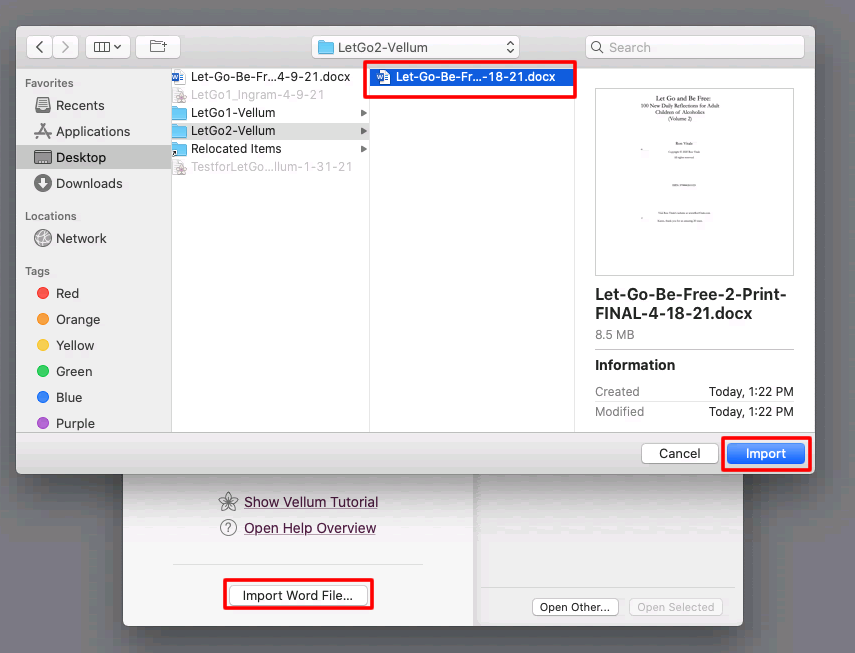
After Vellum loads, click on the “Import Word File…” button and load your Word file to Vellum.
Tip: You’ll need to import a .docx file and if you’re using a virtual Mac, you’ll need to download your Word file to your virtual Mac. The easiest way to do this is to email the file to yourself and then while logged into your virtual Mac, and download the file to your MacinCloud virtual Mac desktop.

This second screenshot of vellum shows the pop-up screen after you click on the “Import Word File” button:
Step 4:
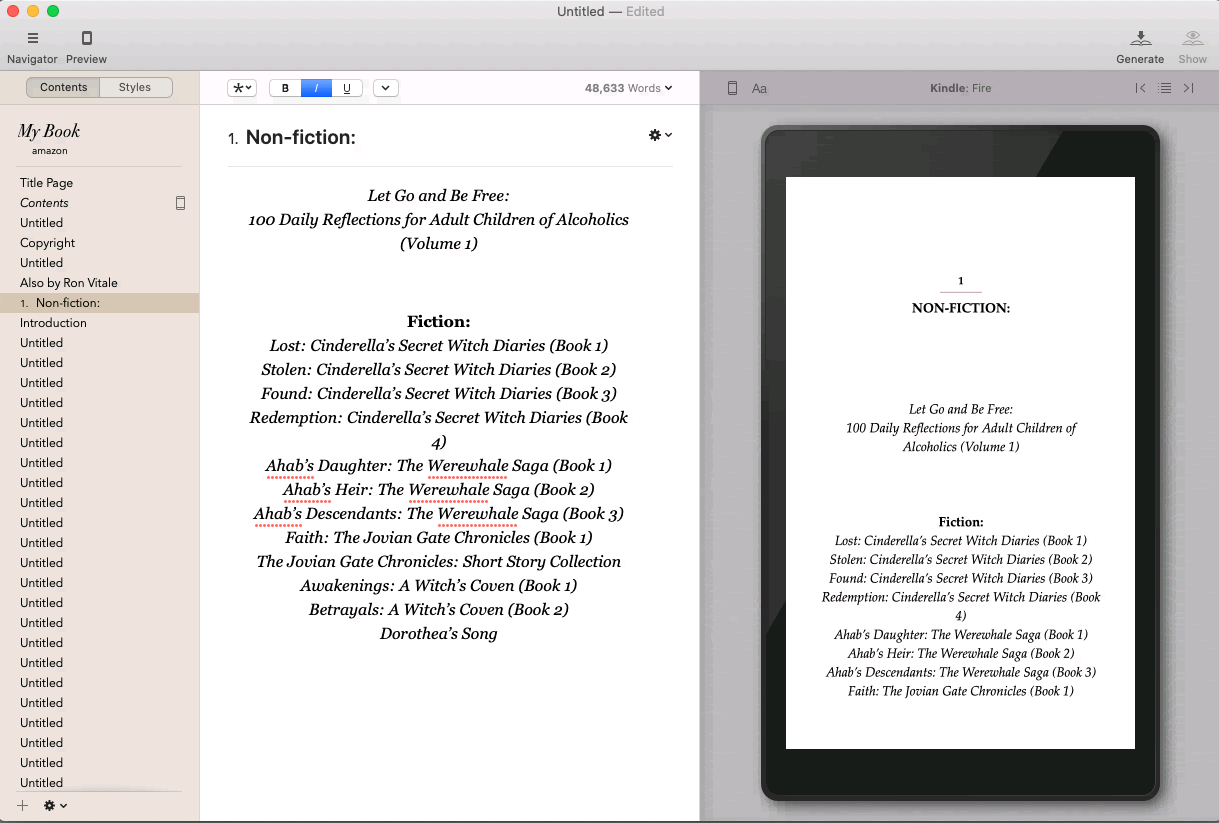
Once you import the Word file, Vellum will load and show you the contents of your book and what your book will look like on a Kindle (the default option).
Step 5:
Click on the “Title Page” listing in the table of contents in Vellum and then click on the “Edit Title Info” if you need to update the title, subtitle, author, or need to add the ISBN number:

Step 6:
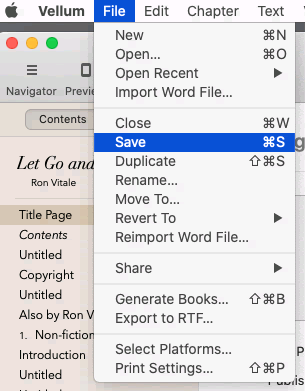
Before going any further with your work in Vellum, save the file on your virtual Mac. Click on “File” in the menu, select “Save,” and save the file on your virtual Mac in the folder of your choice.
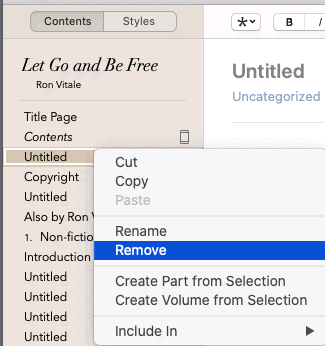
As you work through the table of contents of your book, if there’s a page that was imported that you don’t need, right mouse click on the item and select “Remove.”
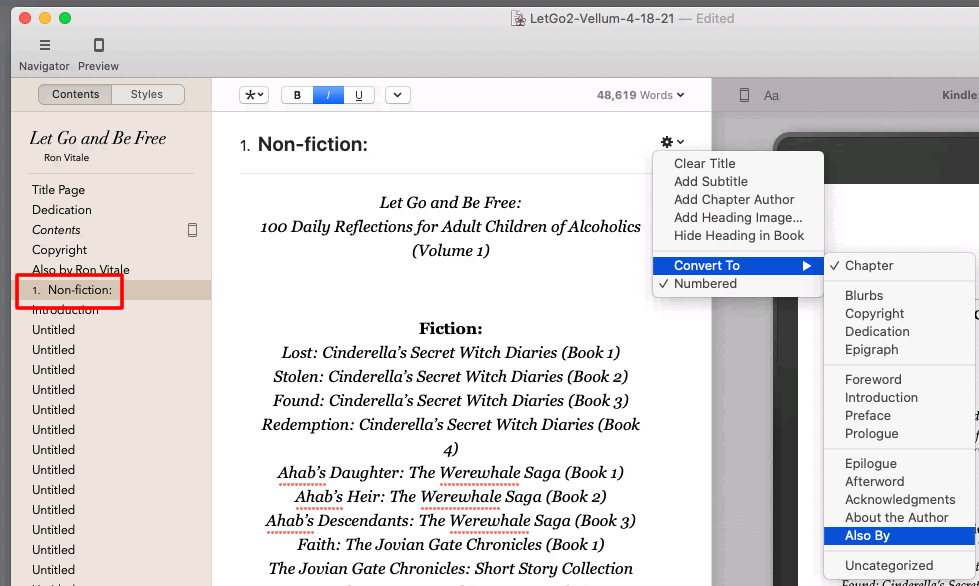
And if you would like to change a page’s style, you can right mouse click on the page, select “Convert To” and then pick the appropriate style:
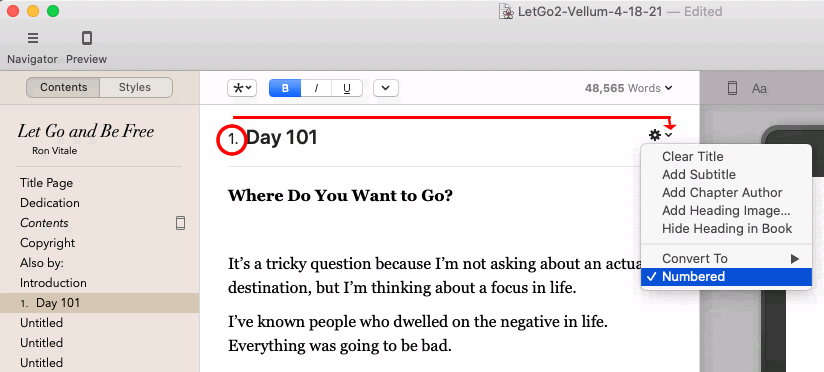
As you go through your chapters, if they’re set to “Untitled” as they are in the screenshot below, you can click on the chapter, click in the Chapter Title area (listed as Day 101 below), and change the title to whatever you want.

In the example I’ve listed, I decided to change the title from “Untitled” as it was when I imported my Word file to “Day 101.” After you change to a title, be sure to convert the section to a Chapter (“Convert To” in the screenshot below), and then remove the check beside “Numbered.”
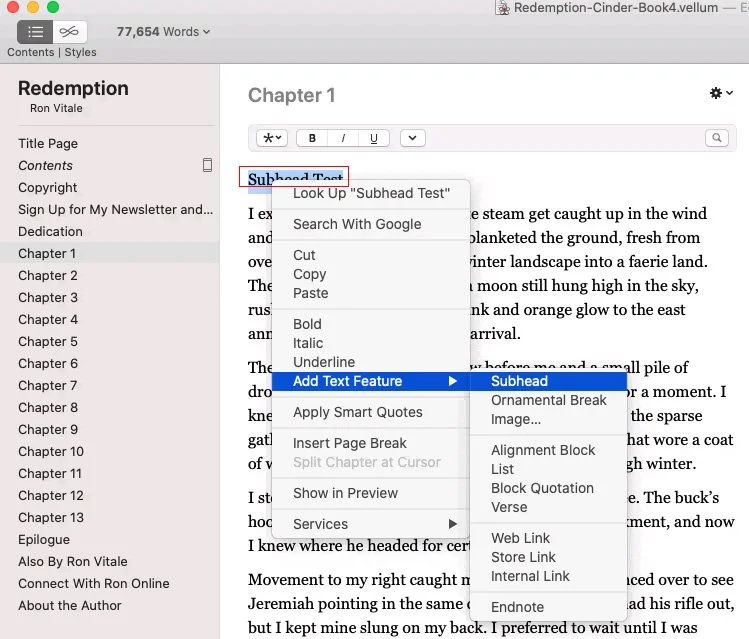
Tip: How to add subheads to your Table of Contents (TOC).
Highlight the text within each chapter that you’d like to be a subhead, right mouse click, choose “Add Text Feature” and select “Subhead.” For example, in the screenshot below the text “Subhead Test” will become my subhead that will show up indented underneath Chapter 1.
Next within your ebook’s TOC that appears in the left-hand navigation within Vellum (see screenshot below), click on the Contents listing, and then click the box for the “List Subheads within Chapters” option.
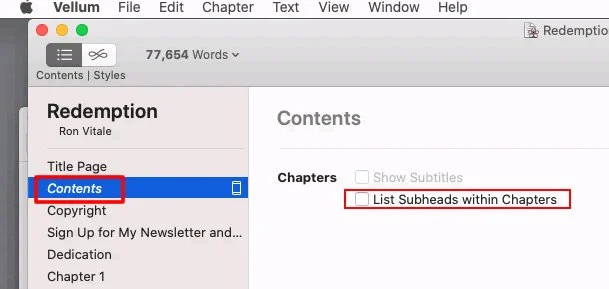
Once you select “List Subheads within Chapters,” in the mockup of your ebook within Vellum, you’ll see your subheads appear under each chapter. In the example provided in the screenshot below, look to the right of the image and you’ll see the subhead “Subhead Test” appearing under Chapter 1 in the Table of Contents (TOC).

Note: To include subheads in your Table of Contents, chapter titles must be categorized as chapters.
Step 7:
Go through your book and for each section type (Chapters, Copyright, Dedication, Also by, etc.), click on the type and review the various styles available for that section:

In the screenshot above, the “About the Author” section is selected. When you click on the “Styles” tab, a carousel will appear that you can scroll through to see various preset styles for the “About the Author” section. The style feature is available for all the sections and is a great way for you to set the beginnings of your chapters with a drop cap or similar style. Note: Styles that you select for the various elements (Dedication, Chapters, etc.) are global (they’ll show for ALL chapters).
Notice the various “Chapter” styles in the screenshot below:

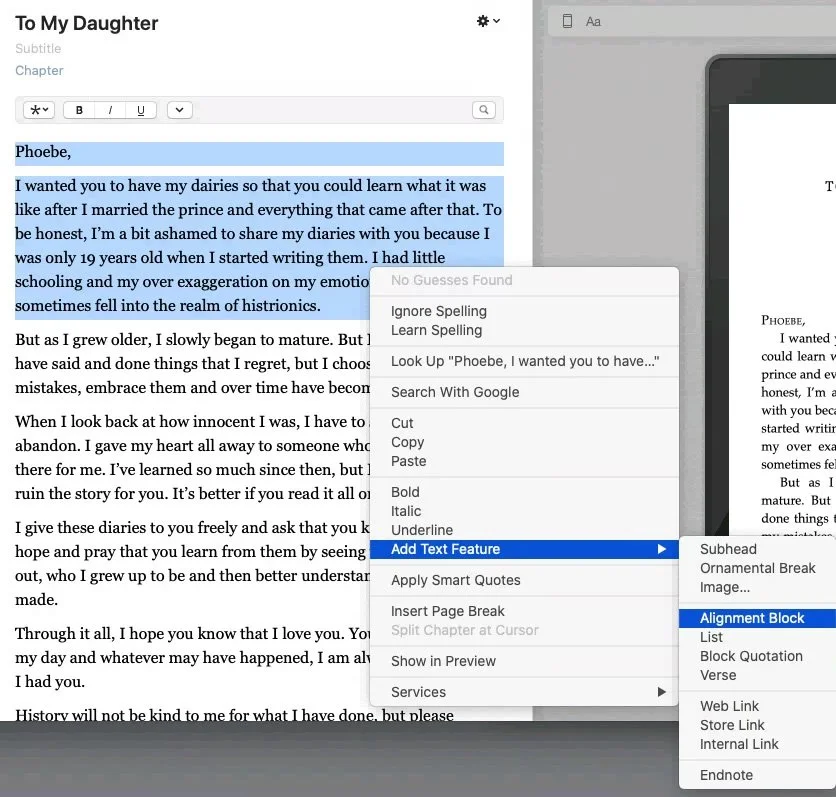
Within Vellum, you also have the ability to override a style’s formatting. Select the text you’d like to have the styling overridden for, right-mouse click, select “Add Text Feature” and then choose “Alignment Block” (and then change the formatting to left justification.
In the example shown below in the screenshot, I wanted to ensure that the letter was left justified and the beginning of a chapter formatting wasn’t applied to the word “Phoebe” and then “I wanted…” would have been indented.
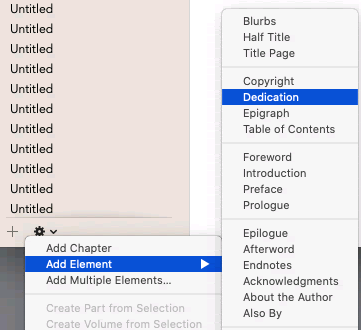
If you’d like to add a section to your book, click on the plus symbol at the bottom of the Table of Contents in Vellum, select “Add Element,” and choose the section you’d like to add. Note that you can drag a new element to a higher (or lower) position in the Table of Contents if you’d like.
Adding images to your book:
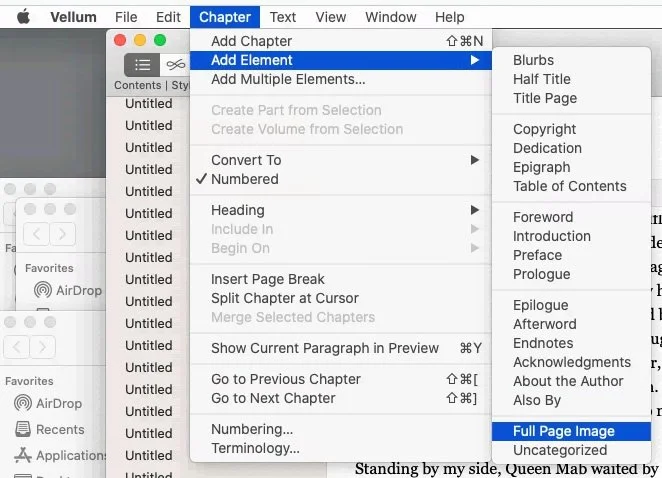
It’s also possible to add an image to the book. Click on “Chapter” in the Vellum main menu, select “Add Element” and then choose “Full Page Image.”
Be sure that you the right size and quality for your image. And note that the image will be added to the bottom of your list of contents. You’ll need to drag the image to the appropriate section in your book. By adding a full page image, you’re simply doing that—this is not inserting an image on the same page with text.
Tip: After you’ve gone through the entire book and styled everything as you’d like, if you make a major error, you can always revert back to a previous version of the file. Having accidentally selected the “Reimport Word File…” option, I nearly fell out of my chair when all my changes vanished from my document and I was left with a clean imported Word doc. Thankfully, the revert feature saved the day, and with a click of a button, I was able to revert back to my previously saved version.
Tip #2: Save your work periodically. It can’t hurt!

Step 8:
After you have gone through and finished styling and editing your book, you’ll need to select the platforms that you’d like Vellum to export your files to. Click on “File,” then “Select Platforms…” and then choose all the various outputs that you’d like. For the settings for a print version of your book, click on “File,” then “Print Settings…” and choose the options that you’d like. For my book, I opted to the default 6 x 9 settings as shown in the screenshot below. So with a few clicks you can use Vellum as your Kindle book formatting software, but also have the software provide you with Apple ibook, Nook, Kobo, and Google Play versions of your ebook.

Tip: Vellum also has the functionality to create Large Print editions of your book. To configure Vellum for a large print book, open the “Print Settings” from Vellum’s File menu. Click on “More Options” and you’ll see the options for large print books. I kept the 6 x 9 in version of the book and Vellum automatically adjusts the font to be 16-point. To adjust the font size, be sure to use the Text Adjustments section in the Print settings. There is a slider in that section so that you can adjust the font size and space between sentences. The minimum recommended font size for a large print edition is 16-point, but the preferred size for large book readers is 18-point. For more information, be sure to read the large print edition instructions on the Vellum website and Russell Phillips’ “How to Self-publish Large-Print Books” article on the Alliance of Independent Authors website.
Step 9:
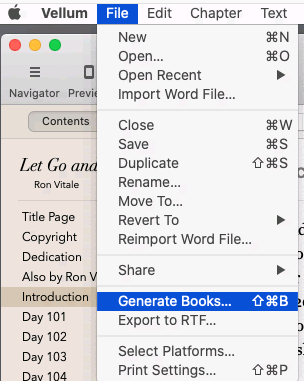
Next click on “File,” select “Generate Books…” and in a matter of a few seconds Vellum will convert your book to the various ebook formats and to a PDF for printing.
Each file is saved in its own folder so that you can clearly differentiate among the various files.
Tip: I found the default print settings in Vellum to work perfectly. I was able to upload the PDF of my book that was generated from Vellum directly to IngramSpark.
Tip #2: When generating a print version for IngramSpark, be sure that you double check that you’ve added your ISBN number to your book.
Step 10:
If you’re using MacinCloud, log into your Google drive folder and then upload all the files there.
Tip: If you’re on the pay as you go plan for MacinCloud, be sure to log out of your virtual Mac so that you’re not charged for time. (If you just close the browser window, you’ll still be logged on the virtual Mac and will be wasting your time.)

Overall I found Vellum intuitive and easy to use. It’s one of the best book formatting software on the market. My only complaint is more with the MacinCloud service: Because I was using a virtual Mac, there were times that my screen would freeze up when doing complex tasks in Vellum. When the screen froze, I simply waited 30 seconds, and then continued working. The freezing issue didn’t happen often, but enough that I wanted to mention it.
I hope you found these instructions helpful!
Please note that there are affiliate hyperlinks used on this page and that I receive a small percentage of sales if you choose to purchase. I only recommend items that I have found helpful and useful, and am passing them on to you to help. Thank you!