Looking to use Vellum to create a large print edition of your book? The good news is that you’re only a few clicks away from achieving your goal. If you’ve not used Vellum before, be sure to read through my “Step-by-Step Instructions of How to Use Vellum to Make eBook and Print Files” post that will walk you through the entire process.
Step 0:
I’m calling this out to save you time so that you don’t make the same mistake I did. When you import your manuscript into Vellum, don’t waste your time preparing the document for large print. I mistakenly spent a good amount of time formatting my word file with 18-point font and all the other recommended formatting for a large print book. Once I imported my completed manuscript into Vellum, I realized that all the work I had done was unnecessary. Vellum will do all the formatting changes for you. And be sure that you’ve used a proofreading tool like ProWritingAid to catch any errors before you start doing your work in Vellum.
Step 1:
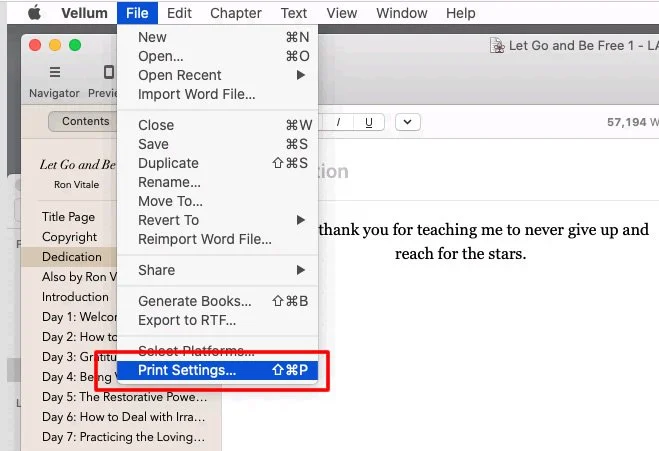
Once you import your completed manuscript into Vellum, select the “Print Settings” under the “File” menu:
Step 2:
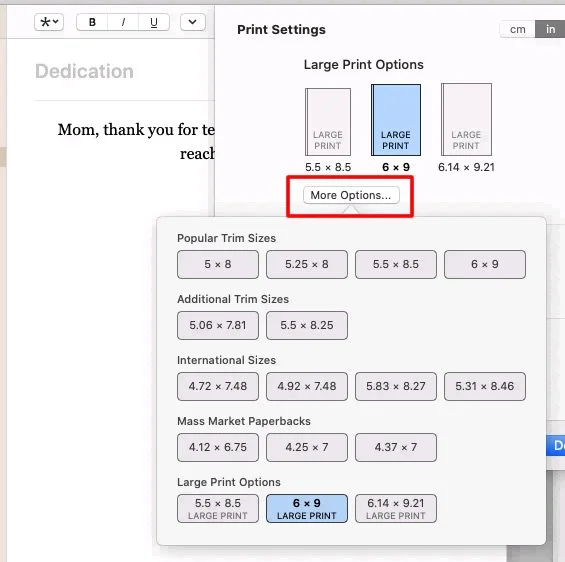
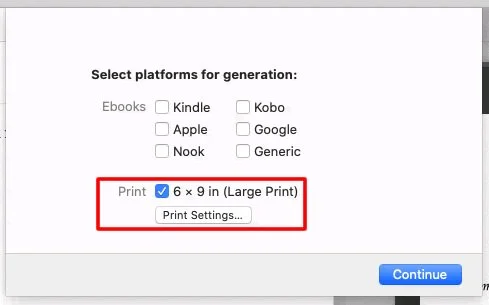
In the “Print Settings” area, click on “More Options” and select which large print option that you would like (I opted 6 x 9 to keep the updating of my cover a bit easier for my designer. If you’d like to get more into the weeds, be sure to check out Russell Phillips’ “Book Production: How to Self-publish Large-Print Books” on the Alliance of Independent Authors’ website).
Step 3:
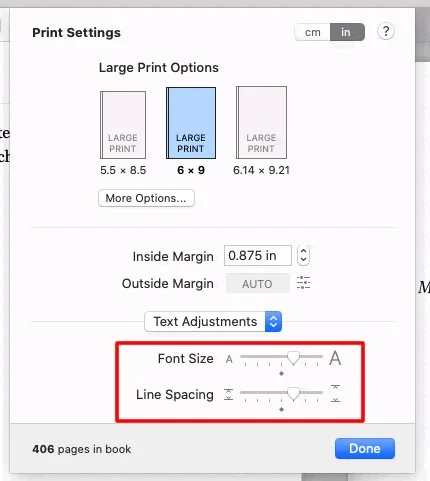
Once have selected “Large Print,” you can also increase the font size and the line spacing. (The default for Large Print is a 16-point font. I like to go a notch above that so that the font size and the line spacing are a bit more than the default. Choose what works best for you.)
Step 4:
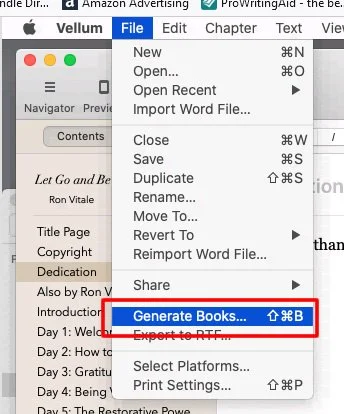
After you have selected all the Large Print options for your book, click on “File” and then “Save” (can’t hurt to have everything saved just in case). Then click on “File” and “Generate Books” as shown in the screenshot below:
Step 5:
On the Generate Books pop-up screen, click on the 3 dots to select which versions you would like Vellum to output documents for:
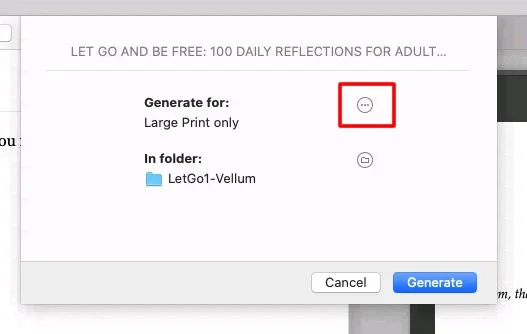
In the screenshot below, I’ve deselected the various ebook options because I only want Vellum to output the Large Print version of the book.
Step 6:
Once Vellum is finished generating your book, navigate to the folder where your file is stored, copy the document from there, and you’re good to go!
Tip: Since I use Mac-in-Cloud to run Vellum (I rent time on a virtual Mac that has Vellum on it so that I can format my books), I’m not as familiar with the Mac operating system so I create a desktop folder with my book’s name and have Vellum output all my files to that folder. Once Vellum generates all my files, I then use the Safari browser on the virtual Mac to log into my Google drive and then I upload all my Vellum files to Google.
Tip #2: Backup, backup, and backup!! Once I log out of my virtual Mac, I log into Google drive on my Windows computer, download the Vellum files and back them up in two other places. I like to have 3 copies of all my important files: a grandmother, mother, and daughter. If you accidentally delete a file, or your laptop is damaged/destroyed, you’re covered.
I hope this “How to Use Vellum” tutorial has been helpful. Good luck!
Please note that there are affiliate hyperlinks used on this page and that I receive a small percentage of sales if you choose to purchase. I only recommend items that I have found helpful and useful, and am passing them on to you to help. Thank you!