by Ron Vitale
What is Hootsuite?
Hootsuite.com is a website that enables you to manage multiple Twitter accounts, Facebook, LinkedIn and Wordpress postings. With Hootsuite, you can also create multiple search columns to help you filter your Twitter stream, track keywords, hashtags or people’s tweets and follow the conversation on your Twitter lists.
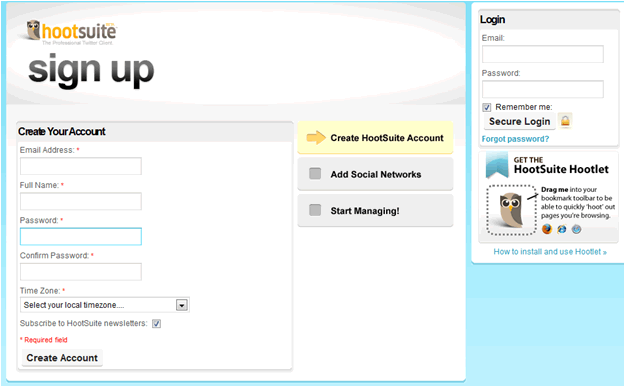
Step 1:
Visit Hootsuite.com, click on the “sign up now” button and complete the following information:
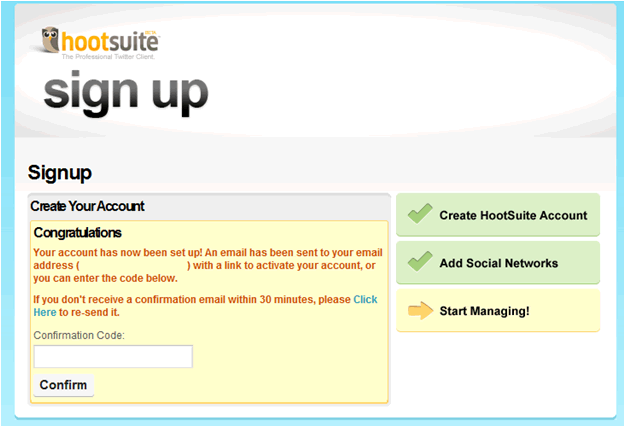
Step 2:
After you create the account, click on the link you’ve received in an e-mail to activate the account or enter the confirmation code in the form box and click on “Confirm” (see the screenshot below):
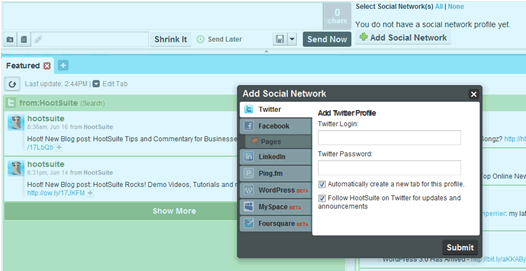
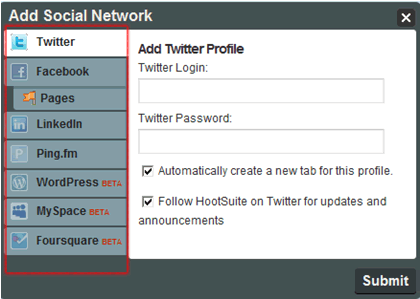
Step 3:
Add your Twitter profile information (login and password) to the Hootsuite pop up:
Step 4:
Once you associate your Twitter account to Hootsuite, a column will be created, showing you all the tweets of those you are following:

Step 5:
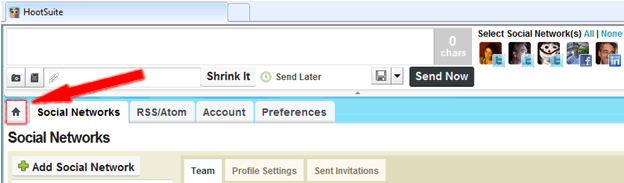
Next add your other social networking accounts (other Twitter accounts, Facebook, LinkedIn, Wordpress, etc.) by clicking on the Owl icon (top left of the Hootsuite page), select “Settings” and then “Social Networks.”
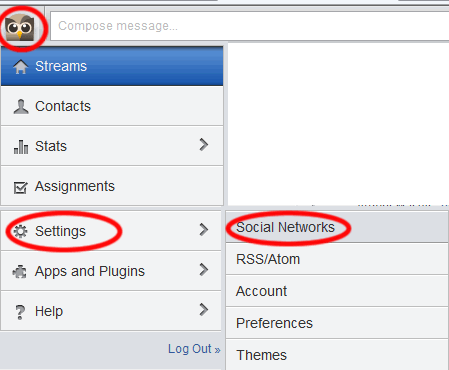
On the next page, select the social network account you’d like to add to your Hootsuite account and follow the instructions to add your login information for that account. Continue to add your social media accounts until you’re finished.
Now that you’ve finished adding your social network accounts to Hootsuite, you’re done. Take a moment to relax and do a happy dance! The next steps are tips on how to use Hootsuite to help you better follow the conversations taking place on your networks.
Setting Up Your Search Columns:
After you’re finished adding your social networks, click on the home tab icon to return to the Hootsuite home page:
Learn Your Way Around Hootsuite:
Here are a few instructions to help you navigate the Hootsuite control panel:

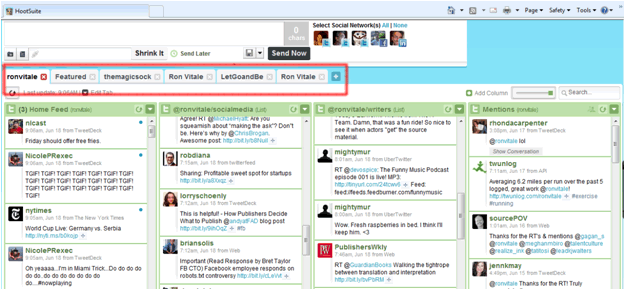
Text input box:
The red oval (pictured above) covers the input box that enables you to send out your 140 messages on Twitter (if using Facebook you’ll see the 420 character limit). To the right of the box is a character counter that counts down to 140.
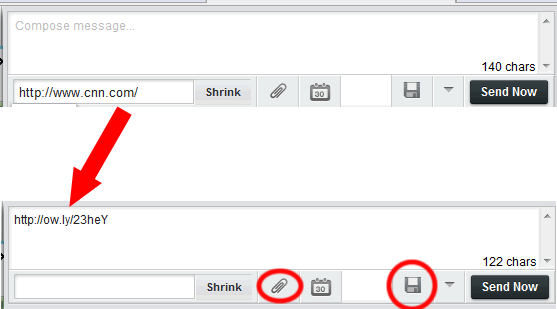
Below the text input box is a smaller link box with a “Shrink It” button. You can take any URL, paste it into the link box and then click on the “Shrink It” button. Your link will not only be shortened but you’ll then be able to use Hootsuite to track the number of clicks on the link. In the example below, a link from CNN.com was shortened to: http://ow.ly/20dQj Note that links in the box do count toward your 140 Twitter cap.
The input box area also has tools for uploading documents or photos as well as a “Send Later” feature. Unless you have no other online storage solutions, I recommend not uploading documents and photos as it’s more effective to use other services to store such items (Flickr, Facebook, Google Docs, etc.). Regarding the “Send Later” feature, I recommend not using it. It works fine, but best practices for social media are to send out live tweets and not schedule them.
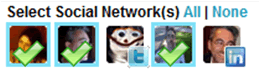
Select Social Networks Area:
To the right of the text input box area, is the “Select Social Network(s)” area. Simply click which social networks you would like to send a message out to:
Now you have an easy way to send one message to multiple places at a few clicks of a button. Remember, your followers of your different social networks are following you for a reason. Best practice is to mix up your messages and try to stay on theme if you have multiple Twitter accounts. Sending every message to all your accounts (all the time) is not recommended.
Access to Your Social Network Columns:
To access your social networks to see the conversations taking place, simply click on one of the tabs. In the example below, I’ve boxed off the social networks that I’ve associated with Hootsuite in red:
Creating columns to filter conversations:
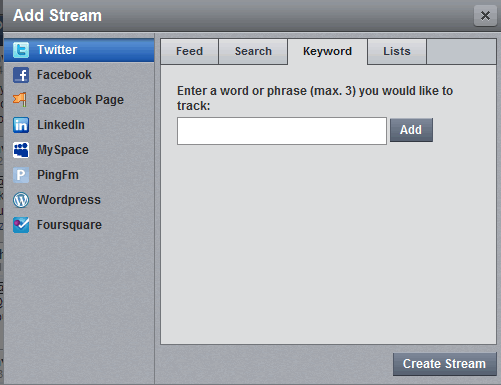
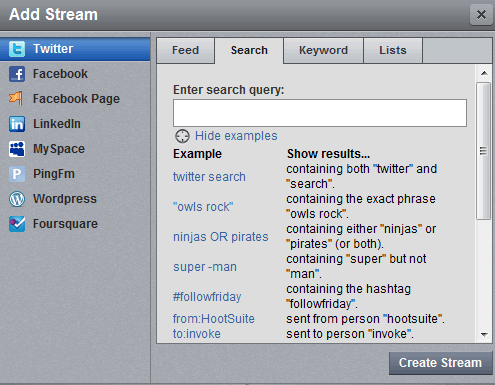
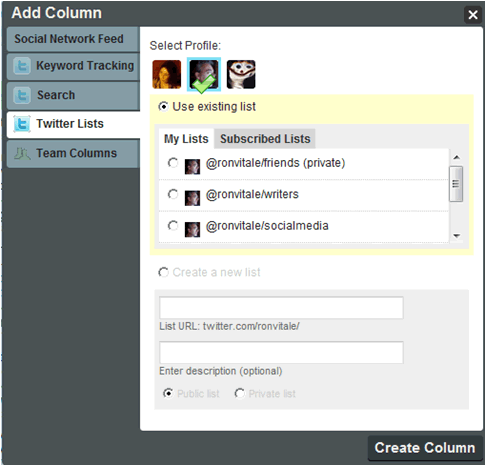
To create a column in Hootsuite, simply click on the “Add Stream” button. For example let’s say you want to better listen to the conversation taking place on Twitter. With the columns in Hootsuite, you can create a column for a keyword, hashtag, or even one of your Twitter lists. To do this, click on the “Add Stream” button below your social network tabs and in the pop up window, select which Twitter profile you’d like to create a column for and then choose whether you wish to create a column for an existing Twitter functionality (Direct Messages inbox, Favorite tweets, etc.) or for a keyword, search result or Twitter list:
The screenshot below is for creating a “Keyword tracking” column:
Below is a screenshot, with examples, of creating a column for a search term:
Below is a screenshot for creating a column for a Twitter list:
What’s a Twitter list? I’m glad you asked. On Twitter, you can create a list of those you wish to follow on Twitter, grouping them as you see fit. For example, if you create a “Journalists” list, you can add only reporters you are following on Twitter to this list. Then, in a “Journalists” column in Hootsuite, you would only see the messages from those reports on your “Journalists” Twitter list.
Implementing this is easy. The most efficient way to create a Twitter list and to add Twitter users to that list is to log into Twitter and create a list. Once logged into Twitter, on the right hand side of the page, click on the “New list” link:
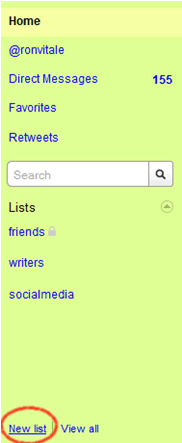
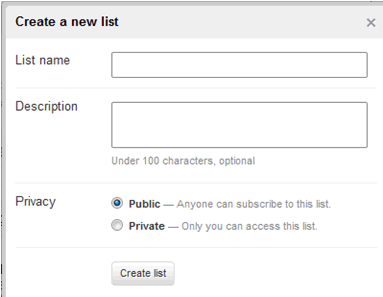
On the pop up window that appears, add the name of your list, an optional description, make the list private or public and then click on the “Create list” button:
After you create a list on Twitter, you can add people to it on Hootsuite by clicking on someone’s name in one of your Hootsuite columns (for example, your Home Feed column). A pop up box will appear, click on the “Add to list” button and select which list to add the person to:
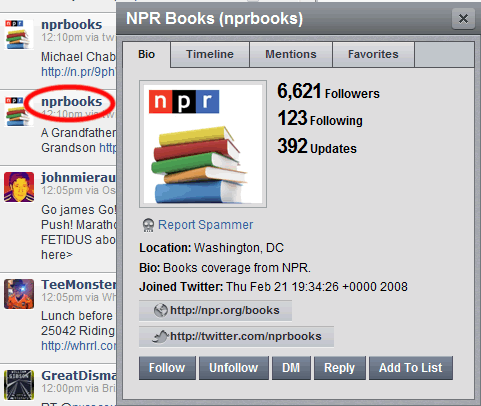
The pop up window also allows you to follow, unfollow, direct message or reply to a person as well as shows you the number of followers that person has, number they are following and their location.
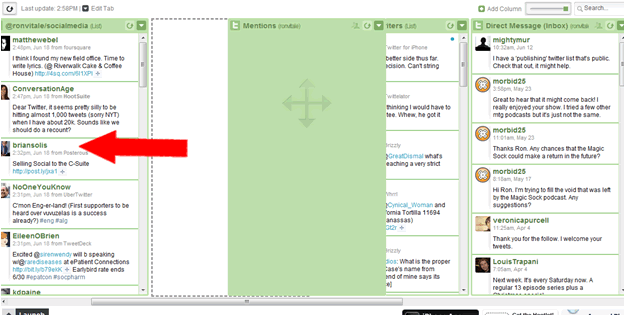
After you have finished creating all your columns, you can then easily follow whatever conversation you would like. To respond to a person’s tweet, position your mouse to the right of a person’s Twitter username and options for replying, re-tweeting and direct messaging will appear. The down arrowhead in the picture below also pulls up additional useful features. And a rule of thumb: A reply tweet is public whereas a direct message is private. Note that with Hootsuite 5, the default for re-tweets is to use Twitter web re-tweets. This means that you’ll be asked to confirm that you want the re-tweet sent out but you’ll not have a chance to edit the re-tweet before it goes out (annoying if a tweet is longer than 140 characters and a link gets cut off). However, you can easily change back to the old Hootsuite re-tweet style: Click on the Owl icon in the top left, select “Settings,” and then choose “Preferences.” To use old style re-tweets, uncheck the “Twitter web re-tweets” box, then click on the "Save Preferences" button.

Tip: Now that you have columns created and your social network accounts associated to Hootsuite, remember you can use Google or the Twitter search engine (search.twitter.com) to help you find others to follow. Typing in a person’s name and the word “Twitter” in Google typically brings up a link to that person’s Twitter profile page. From there you can follow that person, and if you wish, add him/her to one of your lists.
Tip: Don’t like how your columns in Hootsuite are organized? Just grab one with your mouse and pull it to the left so that you can re-arrange columns at will.
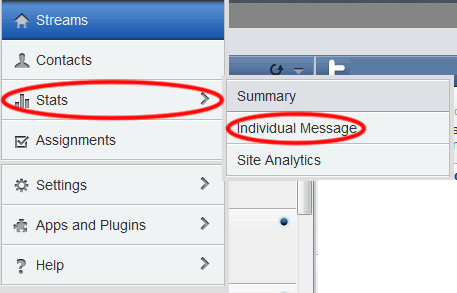
Tracking:
If you send a link out using the “Shrink It” tool in Hootsuite, you’ll be able to track the number of clicks on the links. To access the tracking portion of Hootsuite, click on the Owl icon in the top left of the main Hootsuite screen, select “Stats” and then choose “Individual Message” as shown below:
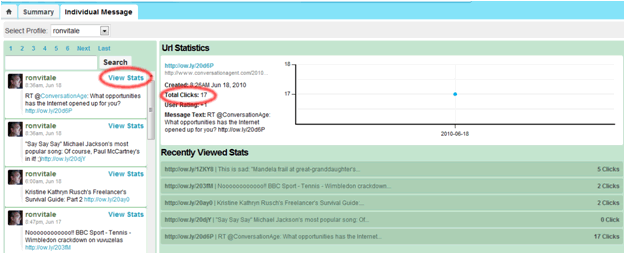
On the next page, you’ll see a list of your most recent tweets that were tracked. Click on the “View Stats” link to see the number of total clicks for a message:
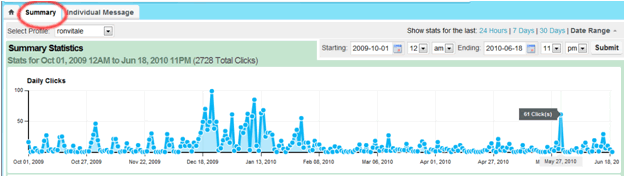
To obtain a high level view of the number of clicks for all your messages over time, simply click on the “Summary” tab:
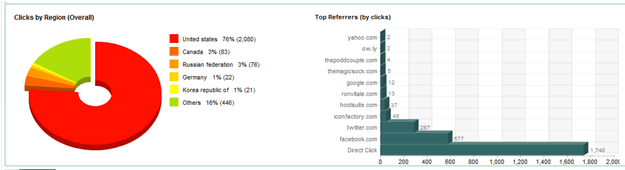
In the “Summary” tracking area, you can also click on the “Clicks by Region” link to obtain a report showing the geographic locations of those who clicked on your links:
Organizational Administration Features:
Hootsuite also enables you to organize and assign social network account responsibilities to different users. For more information on these features, read the official Hootsuite invite team collaboration blog post.
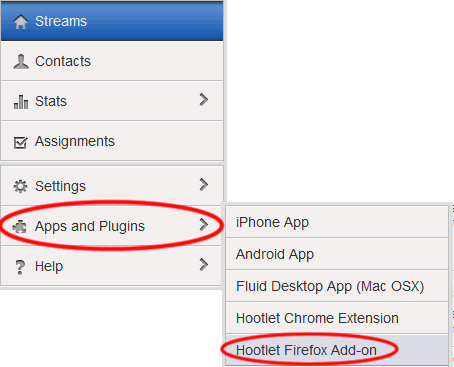
Sharing Tip:
Another useful feature is the “Hootlet” toolbar feature. To add this Add-on to Firefox, click on the owl icon (top left), select “Apps and Plugins” and then choose “Hootlet firefox Add-on.”
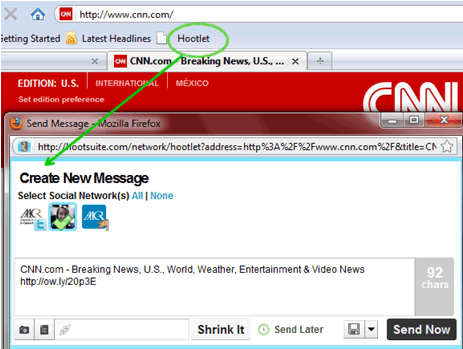
For example, in the screenshot below, I visited CNN.com and clicked on the “Hootlet” link in the bookmark toolbar. A Hootsuite pop up window appears, allowing you to easily send out a message to your social networks that links (in this case) to the page I was reading on CNN.com. The Hootlet tool automatically pulls the web page’s title into the text box along with the shortened (and trackable) link to the page. Just click on the social networks you wish to send the message, edit the message as desired and click on the “Send Now” button. It’s that simple. Using the Hootlet tool is an excellent and efficient way to help share content with your social networks.
I hope these instructions have been helpful as Hootsuite is a great tool to help you navigate and upkeep your social networks.If you enjoyed these instructions, please follow me on Twitter@ronvitale
Thank you.